Edit on GitHub
— הפוסט זמין גם בעבריתSetting Up a Node.JS Development Environment - Setting Continues Integration (CI)
A short manual to set up a standard Project Environment in NODE.JS - Part IV - Setting Continues Integration (CI)

Setting Up a Node.JS Development Environment
Part I – Setting TypeScript
Part II – Setting Linter
Part III – Setting Unit-Tests
Part IV – Setting Continues Integration (CI)
In this last part of the article, we will show how to set a CI system to auto verify the code format, code quality, and code logic on each git push
and also set CD for auto deploy/release using the great GitHub Action system.
First of all, need a GitHub account, and use GitHub as the repository host.
In the project, create the .github/workflows directory, and in it add a file named prj_ci.yml (or any other name just make sure the extension is yml).
This file defined to GitHub a collection of jobs to run.
Using those jobs we are able to run any command, usually, it's used to run linter test, etc.
This configuration file allows to define auto-run jobs manually run jobs, a job for a specific branch, and so on.
Let's define for the example a very simple job, a test job to verify the lint and the tests, and a building job to build and then upload the dist to the GitHub artifiactory.
This is how the file will look like (notice the comments in it)
name: JS-CI-EXAMPLE # The name of this flow

on: [push] # The triggers for this flows, set to be any code push

jobs: # The jobs collection to run
  test: # The first job, the test, here we will make sure the new code was not breading the lint rule sand not breaking the tests.
    runs-on: ubuntu-latest # Run this test on ubuntu based environment
    strategy:
      matrix: # Defined environment to run on, currently we want to run only on node v14
        node-version: [14.x]
    steps: # The steps to run in order to test the new code in this job
    - uses: actions/checkout@v1  # The first step is to checkout the codebase from the repository (This is a build-in GitHub action, no extra info required)
    - name: Install node # The second step is to install Node
      uses: actions/setup-node@v1 # Use build-in GitHub action for it
      with: # Use the version matrix to pass GitHub action the required versions
        node-version: ${{ matrix.node-version }}
    - name: Lint # The third step is to do the major logic, to validate the new code by the linter and to check the test
      run: | # The command to run, install the dependencies as they in the `packages.lock` and run the lint command
        npm ci
        npm run lint
    - name: Test # The forth step in this job is to run the tests and to make sure all of them succeed
      run: |
        npm run test
  build: # The second job is used to build the project then upload the results to the GitHub Actions artifactory.
    needs: test # Mark the build job, as 'test' job needed, so this job will starts only after all test succeeded
    runs-on: ubuntu-latest
    strategy:
      matrix:
        node-version: [14.x]
    steps:
    - uses: actions/checkout@v1
    - name: Install node
      uses: actions/setup-node@v1
      with:
        node-version: ${{ matrix.node-version }}
    - name: Build # This step used to build the project
      run: |
        npm ci
        npm run build
    - uses: actions/upload-artifact@v2 # After the project has been built, upload the results to GitHub Actions the artifactory, (This a build-in GitHub action)
      with:
        name: lib # The name for the uploaded artifact
        path: dist # The path of the built project assets
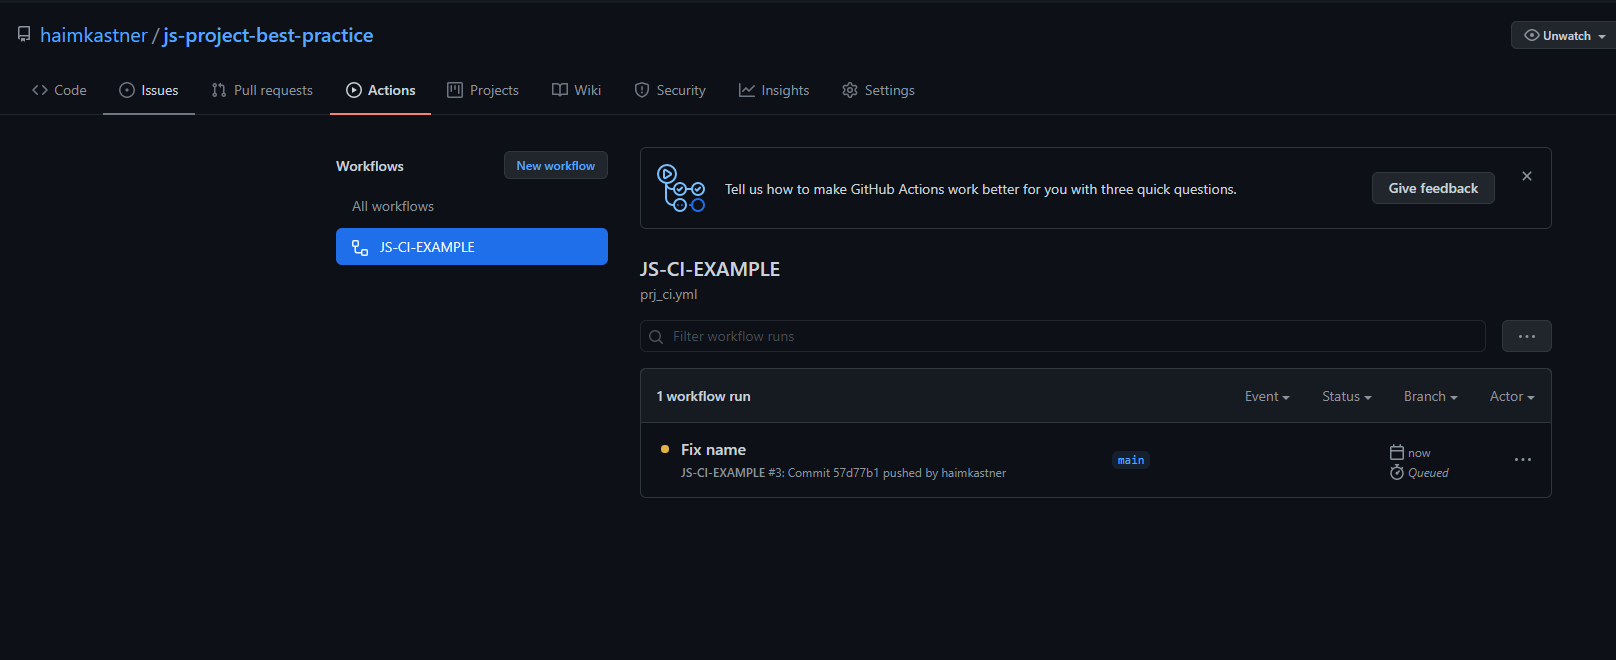
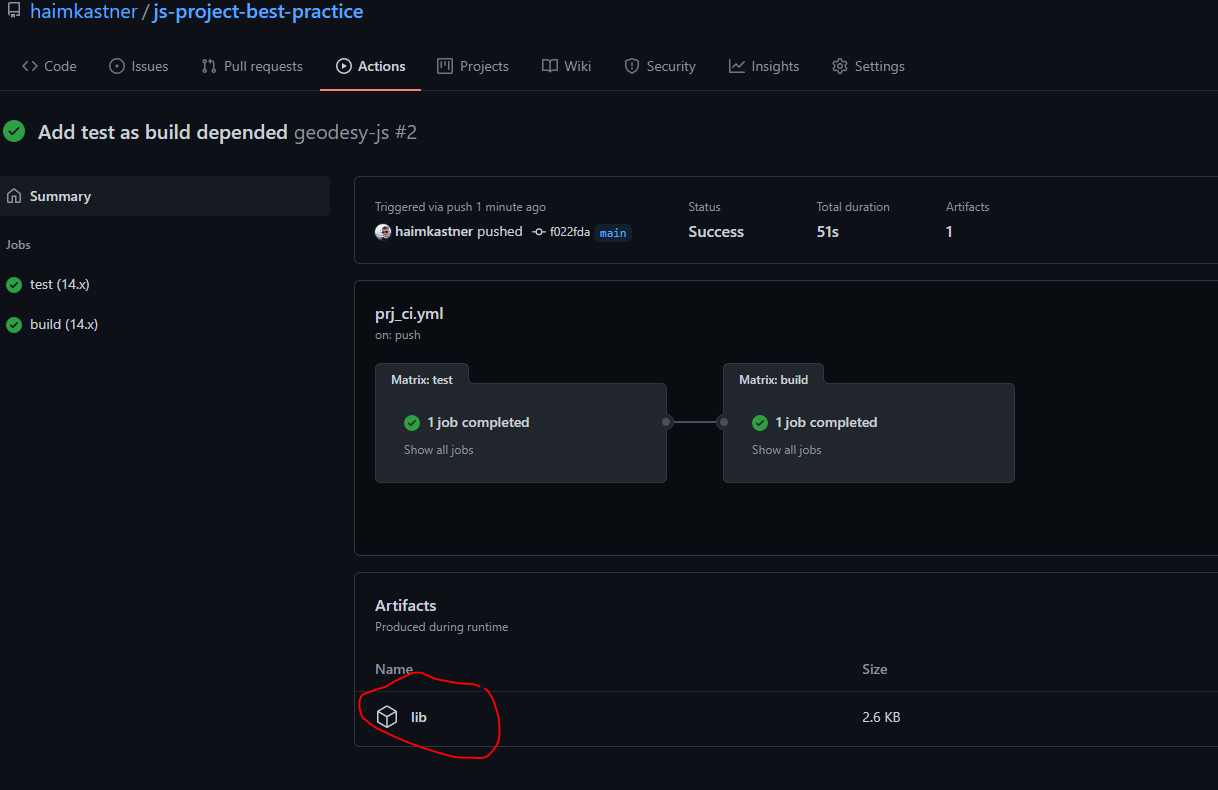
After this will be pushed to GitHub, navigate to the Actions tab in the GitHub web-UI.
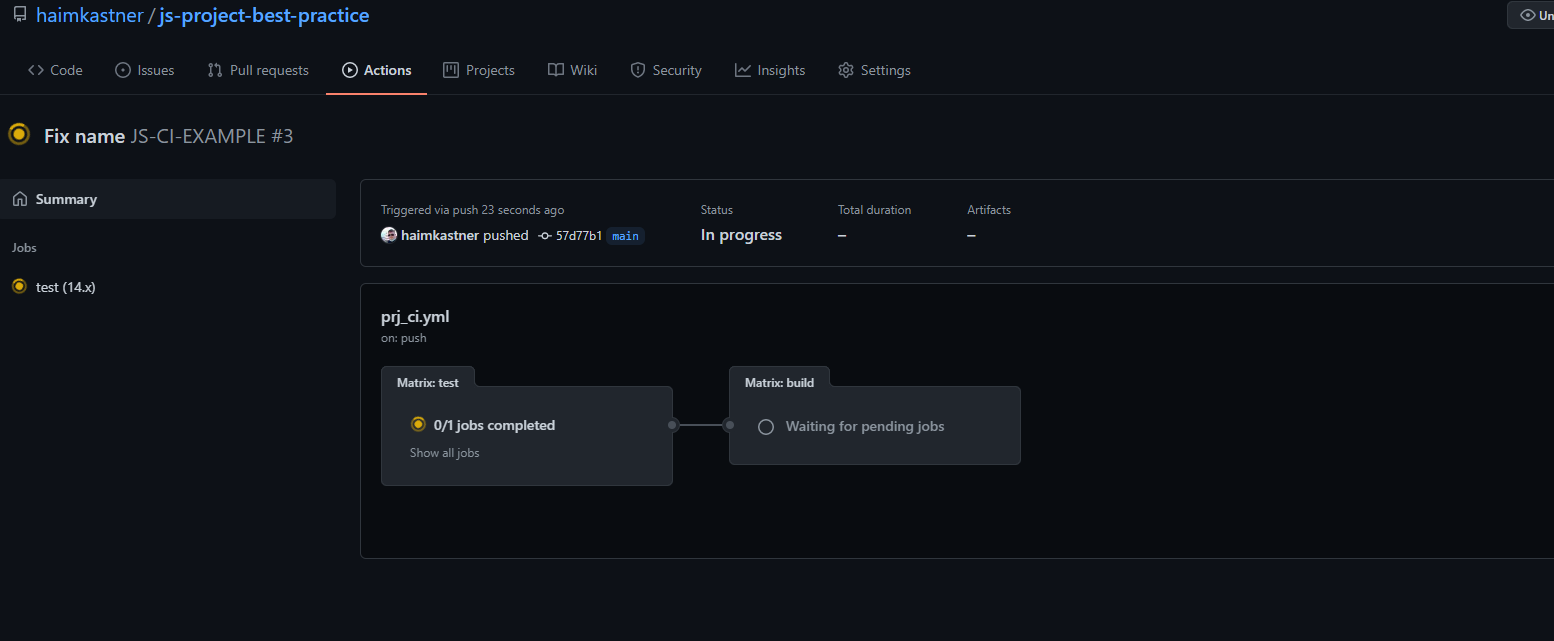
When the job will finish, you will be able to see and download the new artifact assets. (It's also accessible using GitHub API)
Nice, right?
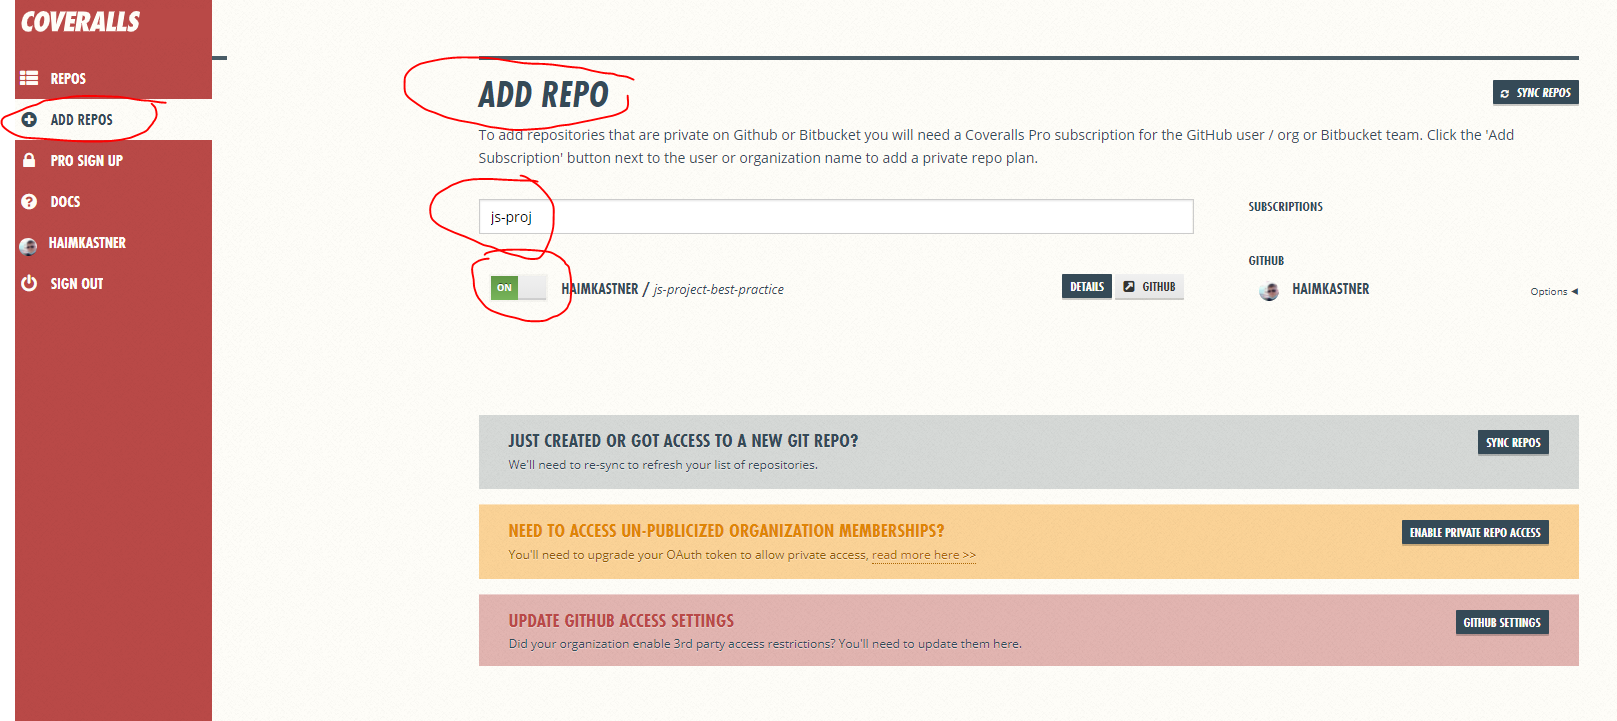
Now let use the ability to generate a test coverage report to get a beautiful and informative dashboard 🧮.
For that, log in to coveralls.io service using the GitHub account, and connect the project repository to coveralls.
Back to the prj_ci.yml file, change the test command from npm run test to npm run cover so the report data will be generated during the test.
Add a new action step of Coveralls that takes the report raw data and sends it to the Coveralls service (they have access to that, remember?).
    - name: Publish to Coveralls # In this last step, the coveralls action will send the code coverage report to the Coveralls dashboard
      uses: coverallsapp/github-action@v1.1.2 # Use the Coveralls ready to use action
      with:
        github-token: ${{ github.token }} # The job token in order to let Coveralls access to the job assets
Now the complete test job will look like this:
  test: # The first job, the test, here we will make sure the new code was not breading the lint rule sand not breaking the tests.
    runs-on: ubuntu-latest # Run this test on ubuntu based environment
    strategy:
      matrix: # Defined environment to run on, currently we want to run only on node v14
        node-version: [14.x]
    steps: # The steps to run in order to test the new code in this job
    - uses: actions/checkout@v1  # The first step is to checkout the codebase from the repository (This is a build-in GitHub action, no extra info required)
    - name: Install node # The second step is to install Node
      uses: actions/setup-node@v1 # Use build-in GitHub action for it
      with: # Use the version matrix to pass GitHub action the required versions
        node-version: ${{ matrix.node-version }}
    - name: Lint # The third step is to do the major logic, to validate the new code by the linter and to check the test
      run: | # The command to run, install the dependencies as they in the `packages.lock` and run the lint command
        npm ci
        npm run lint
    - name: Test # The forth step in this job is to run the tests and to make sure all of them succeed, use the cover script in order to generate the test cover report
      run: |
        npm run cover
    - name: Publish to Coveralls # In this last step, the coveralls action will send the code coverage report to the Coveralls dashboard
      uses: coverallsapp/github-action@v1.1.2 # Use the Coveralls ready to use action
      with:
        github-token: ${{ github.token }} # The job token in order to let Coveralls access to the job assets
The full file is here prj_ci.yml
Push the changes to GitHub.
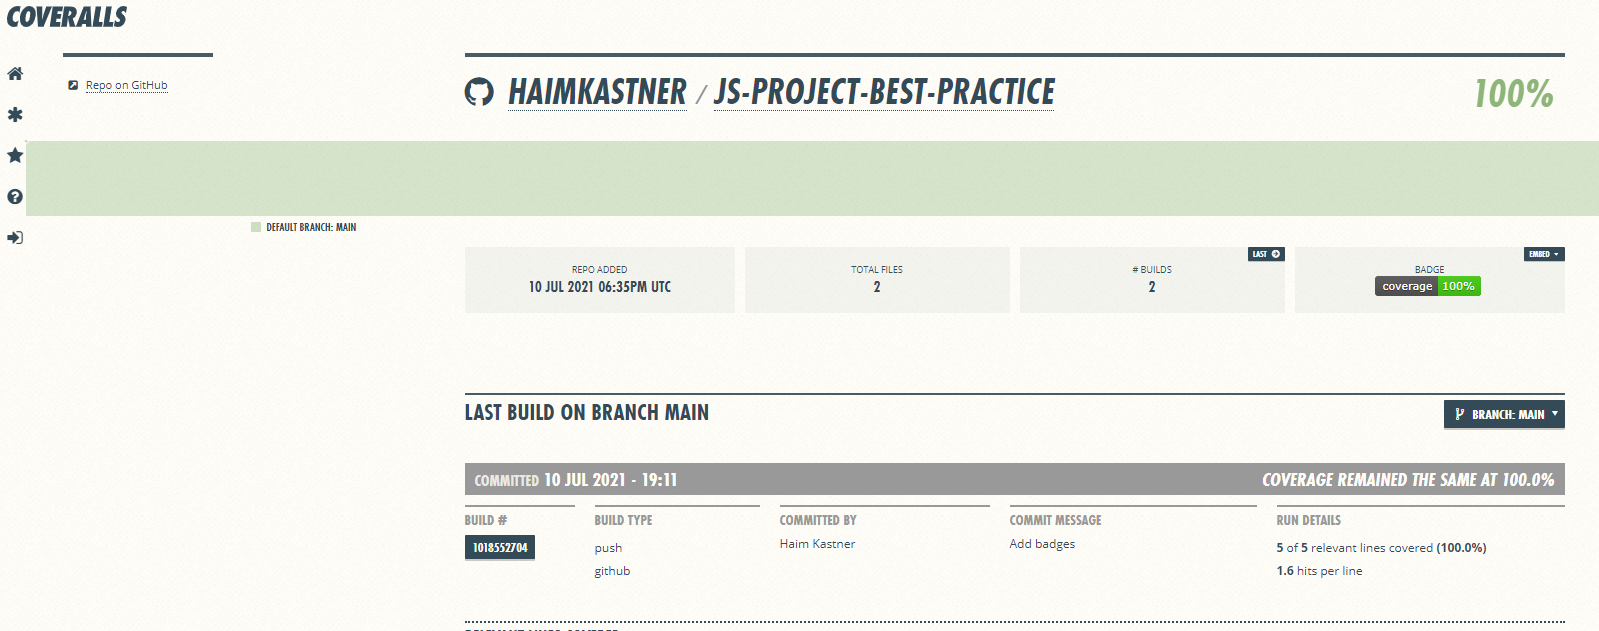
Await to the test job to be done, then you can see the new dashboard info on Coveralls web-UI.
For the example project it will be this URL: https://coveralls.io/github/haimkastner/js-project-best-practice
The GitHub action & Coveralls offer a budge to use in a markdown and easily show the build / converge status.
Create a README.md file (if not yet exist) and in it write in markdown about the project.
This is the place to write how to use the project, how to contribute, general documentation, etc.
In this file we can also add the budges of the build and the converge status.
To do that, add the following line to the file to add the GitHub action status
[](https://github.com/<username>/<repo-name>/actions)
And the following line to add the coverage status
[](https://coveralls.io/github//<username>/<repo-name>/?branch=<branch-name>)
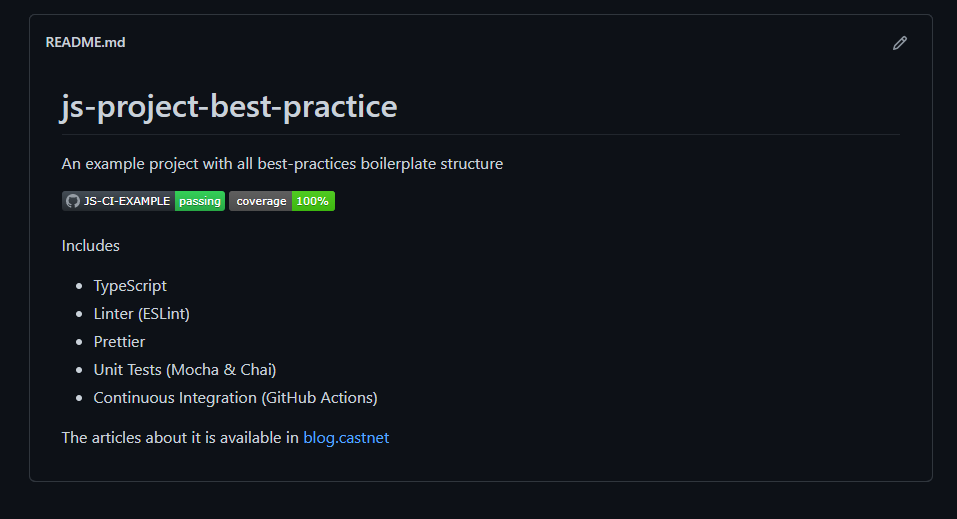
For the example project, it will look like that
# js-project-best-practice
An example project with all best-practices boilerplate structure
[](https://github.com/haimkastner/js-project-best-practice/actions)
[](https://coveralls.io/github/haimkastner/js-project-best-practice?branch=main)
Includes
* TypeScript
* Linter (ESLint)
* Prettier
* Unit Tests (Mocha & Chai)
* Continuous Integration (GitHub Actions)
The articles about it is available in [blog.castnet](https://blog.castnet.club/blog/js-best-practices-config-ts-part-a)
Push it to GitHub then you can see the budges displayed
That is all, the full example project is here js-project-best-practice
It's recommended to dig deeper into those tool options, but for the basic of the basic it's can be enough.
Hope you enjoy the article 😎